Why Most DIY Projects Fail (And What Actually Works for Lasting Home Improvement)
You’ve been there. You scour Pinterest, watch a few YouTube videos, and suddenly, that weekend project feels totally doable. Maybe it’s a built-in bookshelf, a fresh coat of paint in the living room, or even tackling a minor plumbing issue. You buy the materials, clear your schedule, and dive in with enthusiasm. But somewhere between the second coat of paint bleeding under the tape and the bookshelf looking distinctly not level, frustration sets in. The project drags on, costs more than you budgeted, and often ends up looking, well, less than professional. In the worst cases, you abandon it halfway, leaving a costly, unfinished mess. Why does this happen so often? Why do so many promising DIY endeavors turn into sources of stress rather than satisfaction?
In my years of hands-on experience, both as a homeowner and someone who’s helped countless friends navigate their own projects, I’ve seen a clear pattern emerge. It’s rarely about a lack of effort or even skill; it’s about fundamental misunderstandings of the process, underestimating the unseen complexities, and failing to plan for the inevitable hiccups. The mistake I see most often is the assumption that a successful outcome is a direct result of simply doing the steps. What changed everything for me was realizing that the success of a DIY project hinges far more on preparation, realistic assessment, and a willingness to adapt than on brute force or natural talent. It’s about working smarter, not just harder.
Key Takeaways
- Most DIY failures stem from underestimating scope, ignoring critical prep, and rushing through the initial planning phases.
- Invest at least 25% of your total project time in planning, material selection, and understanding potential pitfalls before starting.
- Prioritize quality tools and materials over saving a few dollars upfront; they dramatically improve both outcome and safety.
- Develop a contingency plan for unexpected problems and build in extra time and budget to avoid project derailment.
Underestimating Scope and Skill: The ‘How Hard Can It Be?’ Trap
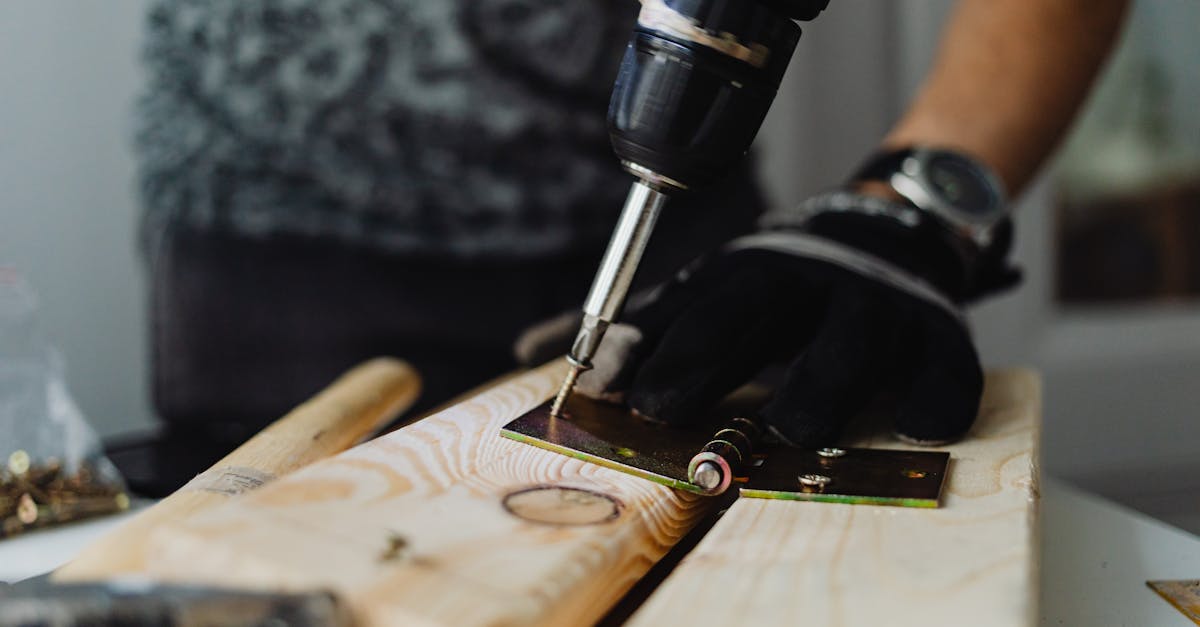
The biggest pitfall I consistently observe is a gross underestimation of what a project actually entails. We see a finished product and assume the journey to get there is linear and simple. This is particularly true for tasks that look straightforward on paper, like painting a room or tiling a backsplash. You think, “It’s just paint on a wall,” but fail to account for the hours of patching, sanding, cleaning, taping, priming, and then the multiple coats, drying times, and touch-ups. A 4-hour painting job can easily swell to 12-16 hours spread across several days once you factor in all the necessary steps for a professional finish. For tiling, it’s not just laying tiles; it’s proper subfloor prep, precise measuring, cutting, thin-set application, grout mixing and application, sealing, and cleanup – all with very specific techniques.
This underestimation often extends to our own skill sets. We watch a professional carpenter on YouTube effortlessly cut a perfect miter joint and think we can replicate it on our first try with a basic handsaw. The truth is, professionals have years of practice, specialized tools, and an innate understanding of materials that a novice simply doesn’t possess. I remember a friend who wanted to install a new light fixture, thinking it was just unscrewing the old and screwing in the new. He quickly found himself staring at a tangle of wires, unsure which was hot and which was neutral, and almost caused a short circuit. My advice is always this: add at least 50% to your initial time estimate, especially if it’s a new skill for you. For anything involving electricity, plumbing, or structural integrity, seriously consider if it’s truly a DIY job or if a professional is a safer, more cost-effective option in the long run. My rule of thumb: if it could cause significant damage to your home or injury to yourself, it’s worth hiring out.
The Fatal Flaw of Poor Planning and Preparation
Most people are eager to jump straight into the doing of a project. They buy materials, clear a space, and get started, often skipping crucial planning and preparation steps. This is like trying to bake a cake without reading the recipe or preheating the oven – you’re setting yourself up for disaster. Proper planning should account for at least 25% of your total project time, especially for anything beyond a simple repair. This includes researching techniques, watching multiple tutorials (not just one!), creating a detailed material list, and, critically, measuring twice (or even three times!) before buying or cutting anything.
Preparation isn’t just about gathering tools; it’s about making sure your workspace and existing structures are ready. For painting, this means thoroughly cleaning surfaces, patching holes, sanding uneven areas, and applying painter’s tape meticulously. For carpentry, it means squaring off your stock and ensuring your cuts are precise. I once spent an entire Saturday helping a neighbor redo a laminate flooring project because they didn’t properly level their subfloor. The result was wavy, buckling planks that looked terrible after just a few weeks. The initial shortcut cost them double the material and labor in the long run. Don’t underestimate the power of a clean, prepared surface and accurate measurements. It’s the foundation of any successful project, and skipping it is almost a guaranteed path to failure.
Skimping on Tools and Materials: A False Economy
It’s tempting to buy the cheapest tools or materials to save money upfront. I’ve been guilty of this myself, opting for bargain-bin paintbrushes or an off-brand power tool that promised the same features as a premium model. However, in my experience, this is almost always a false economy. Cheap tools often lead to inferior results, greater frustration, and can even be dangerous. A flimsy paintbrush will leave streaks, shed bristles, and make a clean line impossible. A cheap drill might strip screws or lose power halfway through a demanding task. Not to mention, cheap tools break faster, forcing you to buy replacements, negating any initial savings.
Similarly, with materials, investing in quality pays dividends. High-quality paint provides better coverage with fewer coats and holds up longer. Durable fasteners ensure your structure remains stable. Choosing the right type of wood, tile, or fabric for the intended use will prevent premature wear and tear. For example, using interior-grade paint on an outdoor fence will result in peeling and fading within months, requiring a complete redo. I always recommend buying the best tools you can afford, especially for items you’ll use frequently, and selecting materials that are appropriate for the project’s demands, even if it means a slightly higher upfront cost. Think of it as an investment in the longevity and quality of your work.
The ‘Perfect Picture’ Delusion and Lack of Contingency Planning
One of the biggest emotional traps in DIY is the pursuit of a Pinterest-perfect outcome on the first try. Social media often presents a polished, idealized version of projects, omitting the struggles, mistakes, and learning curves that inevitably occur. This creates an unrealistic expectation that leads to immense frustration when things don’t go exactly as planned. My advice? Embrace imperfection. Very few DIY projects, especially for beginners, will look like they came from a professional workshop. The goal should be competence and functionality, not immediate flawlessness.
Beyond unrealistic expectations, a major failing is the absence of a contingency plan. What happens if you run out of a critical material? What if a cut goes wrong? What if you uncover rotten wood behind the drywall? Most people operate on the assumption that everything will go smoothly, but in DIY, unexpected problems are the norm, not the exception. For every project, I build in both extra time (at least 20-30% buffer) and extra budget (10-15% for unforeseen expenses). This allows me to absorb unexpected costs, deal with material shortages, or re-do a step without feeling utterly defeated. Having a backup plan – even if it’s just knowing which hardware store has what you need on a Sunday afternoon – can be the difference between a successful project and an abandoned one. This also includes knowing when to call in a professional. Sometimes, admitting a task is beyond your current skill set and hiring an expert is the smartest and most cost-effective contingency plan of all.
Rushing the Process and Ignoring Manufacturer Instructions
In our instant-gratification world, there’s a strong temptation to rush DIY projects. We want to see results quickly, often leading us to cut corners or skip steps. This could mean not allowing paint to properly dry between coats, applying caulk too quickly, or not letting wood glue cure for the recommended time. Each of these shortcuts compromises the integrity and finish of the project. I once saw someone apply a second coat of stain only an hour after the first, leading to a patchy, uneven finish that took days to sand off and redo properly. Patience is not just a virtue in DIY; it’s a fundamental requirement for success.
Equally detrimental is ignoring manufacturer instructions. Whether it’s the mixing ratio for concrete, the specific temperature range for applying adhesive, or the recommended safety precautions for a power tool, these instructions are there for a reason. They represent extensive testing and expertise. Overlooking them can lead to poor performance, material failure, and even injury. I’ve seen projects where cabinets weren’t mounted correctly because the installer didn’t follow the specific screw and anchor recommendations, resulting in sagging doors after only a few months. Always read the instructions, watch the video tutorials provided by the manufacturer if available, and adhere to recommended drying, curing, and application times. It will save you headaches, material, and often, money in the long run.
Frequently Asked Questions
Q: How do I know if a DIY project is too advanced for me?
A: If a project involves structural changes, significant electrical rewiring (beyond fixture replacement), major plumbing (beyond simple faucet replacement), or requires specialized tools you don’t own and won’t use regularly, it’s likely too advanced. Also, if you feel any hesitation or fear about potential damage or injury, it’s a good sign to call a professional. Always prioritize safety and the long-term integrity of your home.
Q: What’s the best way to estimate project costs accurately?
A: Start by listing every single material and tool you’ll need, even small items like sandpaper or screws. Research prices from multiple suppliers. Then, add a contingency budget of 10-15% for unexpected expenses. Don’t forget to factor in the cost of disposing of old materials, if applicable. Online calculators can help, but always cross-reference with actual store prices.
Q: How can I improve my DIY skills without risking a major project?
A: Start small! Tackle low-stakes projects first, like painting a single wall, building a simple shelf, or patching a small hole. Watch lots of tutorials, read detailed guides, and practice techniques on scrap materials. Many hardware stores offer free workshops. The key is building confidence and basic competence before attempting more complex tasks.
Q: When should I hire a professional instead of doing it myself?
A: Hire a professional when: the project requires specialized licenses (like for major electrical or plumbing work), involves significant risk of injury or property damage, the time commitment is unrealistic for your schedule, the required tools are too expensive for a one-time use, or you simply don’t have the patience or interest in learning the necessary skills. Getting multiple quotes is always a good idea.
Q: What are essential tools every DIYer should own?
A: A basic toolkit should include a good quality drill/driver, tape measure, level, hammer, screwdrivers (Phillips and flathead), pliers, utility knife, stud finder, safety glasses, and a set of wrenches. As you tackle more projects, you can expand to a circular saw, orbital sander, and a good quality wet/dry vacuum.
Successfully completing a DIY project isn’t about being a master craftsman from day one; it’s about intelligent planning, realistic expectations, and a commitment to doing things right, even if it takes a little longer. By avoiding these common pitfalls and focusing on preparation and quality, you can transform your home improvement dreams into satisfying, lasting realities. So next time you’re inspired by a project, take a deep breath, make a detailed plan, and remember that patience and precision are your most valuable tools.
Written by Mark Chambers
DIY projects and financial wellness
A seasoned editor who believes in the power of clear, concise, and genuinely useful information.
You Might Also Like

Why Decluttering Isn't Enough for Lasting Organization (And What Actually Works)
Discover why simply decluttering often fails to create lasting home organization. Learn actionable strategies for a truly tidy and functional space.

Home Organization Tips That Actually Work
Getting organized isn't about buying more storage bins — it's about owning less and creating systems that run on autopilot.

The Case for a Digital Detox (And How to Actually Do It)
Constant connectivity has real costs. Here's why intentional time away from screens matters and how to make it work in your life.